Vender Bomba Freio De Embreagem Hidráulica De Moto melhor preço
4.8
130
avaliações
133
vendido
R$ 49
8% OFF
R$ 45
| Envio de | China Continental |
|---|---|
| Color | Black Gold Red Blue Silver |
Descrição do Produto
Descrição do produto em inglês após português
Especificação:
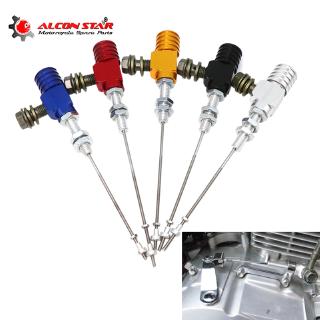
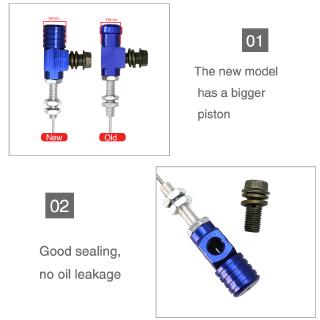
Este é modelo novo, possui um pistão maior.
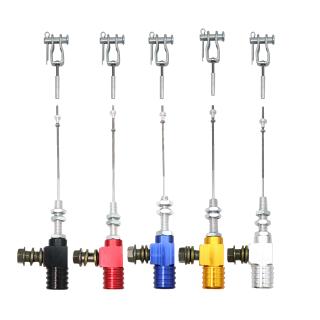
Cor: Preto,Vermelho,Azul,Gold,Prata
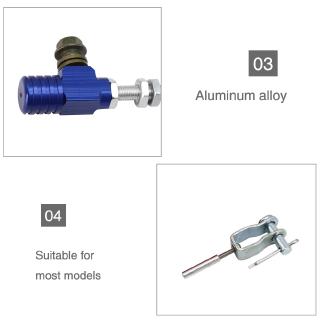
Material Principal: Alumínio
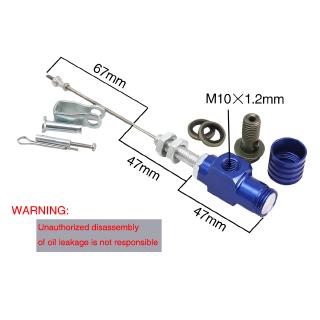
Comprimento Inteiro: 161mm
Tamanho da Rosca: M10x1,2mm
Encaixe: Universal para a maioria das motocicletas
Quantidade: 1 pc
Conteúdo da Embalagem:
1 x bomba de freio hidráulico de moto
Método de instalação:
1. Primeiro preencha a bomba inferior com fluido de freio, sem ar, a porta do fio é grande, pode ver se há bolhas por dentro. Puxe o fio repetidamente para expulsar bolhas de ar completamente.
2. Olhe para o parafuso na foto acima, e apertar o tubo de óleo com o parafuso. Não aperte isso. É necessário que o furo lateral do parafuso pode ser exposto.
3. Este ponto é a chave, e devemos ser otimistas. Conecte a bomba superior ao cano de óleo e levantar, preenche o copo de óleo superior com óleo, e depois pressione o cabo várias vezes (dentro 10 vezes) à vontade, depois espere por 5-10 minutos agora O furo lateral do parafuso que não está apertado na figura acima verá o fluido de freio. Nesta época, o parafuso é apertado e o escapamento é concluído.
4. Preste atenção a dois pontos: 1 parafuso de tubagem é inclinado 45 graus ao solo, e 2 o cabo é apontado em 45 graus para o céu. Depois destes dois ângulos são determinados, repetidamente tocam a bomba e pressione a alça. Nunca use métodos comuns de reparar carros!!!
5. O método de inspeção após o escape de embreagem hidráulica é concluído: 1 Empurrar o fio da bomba inferior ao final interno da bomba, pinche a alça da bomba superior, e mova a cabeça do fio da cabeça de cerca de 2-3 cm, não vai ser apertado, que está correto. (Veste o cabo até não pode ser pressionado mais, cerca de 3 cm de distância do guidão, significa que o escape seja concluído, podendo ser instalado e depurado),
6. Ao instalar o braço de rocha, não deixe de puxar todos os fios de aço e fixar a bomba no braço de rocker embreagem. (Certifique-se de que os fios de aço estão todos esticados quando o cabo de embreagem é liberado.) Dedos empurrem o braço de rocker embreagem sem lacuna.
**************************************************
Description:
Specification:
This is new model,has a bigger piston.
Color: Black,Red,Blue,Gold,Silver
Main Material: Aluminum
Whole Length: 161mm
Thread Size: M10x1.2mm
Fitment: Universal for most motorcycles
Quantity: 1 pc
Package Contents:
1 x Motorcycle hydraulic clutch brake pump
Installation method:
1. First fill the lower pump flat with brake fluid, no air, the wire port is large, you can see if there are bubbles inside. Pull the wire repeatedly to expel air bubbles completely.
2. Look at the screw in the picture above, and tighten the oil pipe with the screw. Do not tighten it. It is required that the side hole of the screw can be exposed.
3. This point is the key, and we must be optimistic. Connect the upper pump to the oil pipe and raise it, fill the upper pump oil cup with oil, and then press the handle several times (within 10 times) at will, then wait for 5-10 minutes now The side hole of the screw that is not tightened in the above figure will see the brake fluid flowing out. At this time, the screw is tightened and the exhaust is completed.
4. Pay attention to two points: 1 the tubing screw is tilted 45 degrees to the ground, and 2 the handle is pointed at 45 degrees to the sky. After these two angles are determined, repeatedly tap the pump and press the handle. Never use common methods of repairing cars! ! ! ! !
5. The inspection method after the hydraulic clutch exhaust is completed: 1 Push the lower pump wire to the inner end of the pump body, pinch the upper pump handle, and move the head end of the handle about 2-3 cm, it will not be pinched, which is correct. (Press the handle until it can't be pressed anymore, about 3 cm away from the handlebar, it means that the exhaust is completed, and it can be installed and debugged),
6. When installing the rocker arm, be sure to pull out all the steel wires and fix the pump to the clutch rocker arm. (Make sure that the steel wires are all stretched out when the clutch handle is released.) Fingers push the clutch rocker arm with no gap.
